How to Install Paint Protection Film: Step-by-Step Guide
Installing Paint Protection Film on your car is one of the smartest ways to shield your vehicle’s paint from scratches, road debris, and daily wear. While many drivers assume this is a job only for professionals, the truth is, with the right tools and some patience, a DIY paint protection film installation is totally doable. This guide will walk you through the process clearly and simply, helping you understand the film’s purpose, how it performs, and how to avoid costly mistakes. Let’s dive into how to install PPF the right way.

What Is Paint Protection Film and Why Install It Yourself?
Paint Protection Film, also known as clear bra, is a transparent, self-healing film applied to your vehicle’s painted surfaces. It protects against chips, scratches, and stains caused by road debris, insects, and harsh weather. Installing it yourself can save hundreds or even thousands of dollars in labor costs. It also allows you to control exactly how and where it’s applied, especially for car owners who like working on their vehicles. With TPU film installation, you get a durable, anti-scratch layer that extends the life and appearance of your car’s paint. Learn more about the types of paint protection film available today to make an informed decision.
Tools You’ll Need for a DIY PPF Installation
DIY PPF Install Kit: What’s Inside?
A quality DIY paint protection film kit will typically include:
- Pre-cut PPF sections (or bulk rolls)
- Squeegee
- Spray bottle
- Slip solution (soap + water mix)
- Tack solution (alcohol + water mix)
- Utility knife
- Heat gun or hairdryer
- Microfiber cloths
- Gloves
Having the right tools is crucial for achieving a professional-looking finish and minimizing air bubbles, wrinkles, or peeling. You should also consider the PPF usage volume required based on your vehicle type and the sections you plan to wrap.
Step-by-Step Guide to Install Paint Protection Film on Your Car
Step 1: Wash and Prep the Surface
Before anything else, clean your car thoroughly. Any dirt, dust, or wax can interfere with adhesion. Use a clay bar if necessary to remove any embedded contaminants.
Step 2: Set Up Your Workspace
Choose a well-lit, dust-free environment. A closed garage is ideal. Keep the temperature moderate to allow the film to be flexible but not overly soft.

Step 3: Mix Your Slip and Tack Solutions
- Slip solution helps you position the film without it sticking immediately. Mix baby shampoo or dish soap with distilled water.
- Tack solution helps lock down the edges and curves. Use a mix of 70% isopropyl alcohol and water.
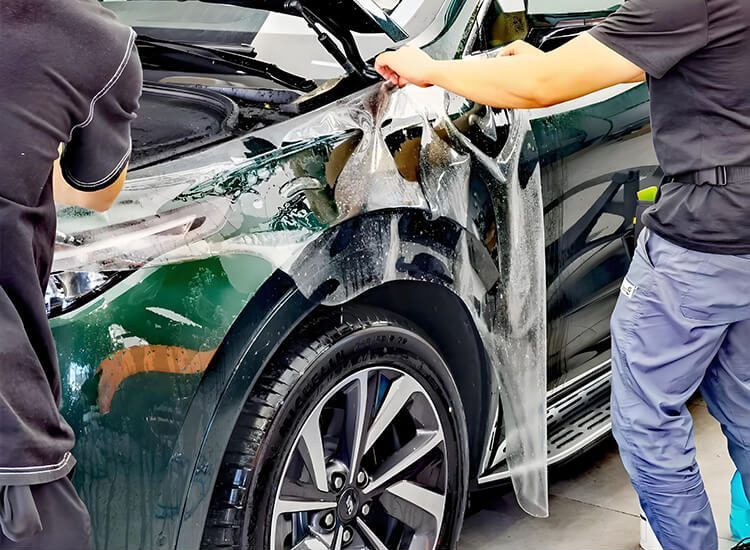
Step 4: Spray the Area and Apply the Film
Spray the slip solution generously on the surface and the adhesive side of the film. Carefully place the PPF on the panel, adjusting its position until perfectly aligned.
Step 5: Squeegee the Film
Starting from the center, use a squeegee to push the slip solution out from underneath the film. Use smooth, overlapping strokes.
Step 6: Lock Down the Edges
Once the main area is settled, use the tack solution to secure the edges and corners. Spray, then press firmly with your squeegee or gloved fingers.
Step 7: Heat and Stretch Where Needed
For curved surfaces, like bumpers and mirrors, a heat gun or hairdryer will help make the film more pliable. Gently stretch and press it into place.
Step 8: Final Check and Cure Time
Inspect for bubbles or lifting edges. Allow the film to cure for 24 to 48 hours without washing the vehicle. Avoid direct sunlight during this time.

Common Mistakes to Avoid When Installing PPF
Installing PPF Without Proper Cleaning
Skipping the cleaning process will trap dirt underneath, leading to visible imperfections and poor adhesion.
Using the Wrong Solutions
Overly soapy solutions or too much alcohol can affect adhesion. Always follow mixing ratios and test on a small area first.
Stretching the Film Too Aggressively
Stretching can distort the film or reduce its effectiveness. Heat and patience are better tools than force.
Ignoring Edges and Corners
These areas are the most prone to peeling. Always seal them properly with tack solution and pressure.
Professional vs DIY: Which PPF Installation Method Is Better?
Pros of Professional Installation
- Guaranteed workmanship
- Faster turnaround
- Advanced tools and experience
Pros of DIY Paint Protection Film Installation
- Huge cost savings
- Personal satisfaction
- Flexibility in coverage areas
If you’re detail-oriented and have some time, a DIY PPF install can be very rewarding. However, high-end or complex car panels might still be worth leaving to the pros. Check out this detailed paint protection film cost breakdown to understand what professionals typically charge and what you can save.
How to Maintain Your Paint Protection Film After Installation
Avoid Harsh Chemicals
Use pH-neutral car shampoos. Avoid bug removers or degreasers for the first few weeks.
Hand Wash When Possible
While PPF can withstand automatic car washes, hand washing reduces the risk of edge lifting.
Use Ceramic Coating (Optional)
Adding a ceramic coating on top of your clear bra installation can enhance gloss, ease of cleaning, and hydrophobicity.
Regular Inspections
Check for lifting edges, discoloration, or surface damage. Address any issues early to prevent them from spreading.
")
Can You Install Clear Bra Without a Heat Gun?
Yes, you can, especially on flat surfaces. However, for tight curves and bumpers, a heat gun or hairdryer makes the job much easier. It softens the film, allowing better conformity and adhesion.
How Long Does It Take to Install Paint Protection Film?
For beginners, expect to spend 3–8 hours depending on the size of the vehicle and number of panels. Smaller sections like mirrors or door cups may take 30–60 minutes each. Full car wraps could take several days if done gradually. The total time can also vary depending on coverage and prep, which can influence the PPF coating cost.
Is DIY PPF Worth the Time and Effort?
Absolutely—if you value saving money and enjoy hands-on work. It’s a learning process, and your first install may not be flawless, but it’s highly satisfying and functional.
What Parts of the Car Are Hardest to Install Film On?
Bumpers, mirrors, and wheel arches due to their curves and tight angles. These areas may require more heat, stretching, and precision.
Frequently Asked Questions (FAQs)
1. Can I install paint protection film at home without professional tools?
Yes, with a DIY PPF install kit and careful preparation, many car owners achieve excellent results.
2. Will installing PPF affect the paint warranty of my car?
Most OEMs accept PPF, especially high-quality TPU film installation. Check your manual to confirm.
3. How do I remove PPF if I make a mistake?
Use gentle heat and peel slowly. Avoid pulling hard or fast, which may damage the paint underneath.