Automotive Paint Protection Film Installation: Step-by-Step
If you love your car, you probably want to keep its paint looking as new as the day it left the showroom. That’s where automotive paint protection film installation comes in. Many car owners are curious about the process, wondering if they can do it themselves or if professional help is necessary. In this guide, we’ll walk you through a PPF installation step by step, explain the tools you’ll need, cover common mistakes to avoid, and help you decide the best approach for your situation.

PreproPPF Clear PR-Q01
On a budget? Check out basic protection PPF PR-Q01, 5×50 ft, free shipping worldwide.
What Is Automotive Paint Protection Film Installation?
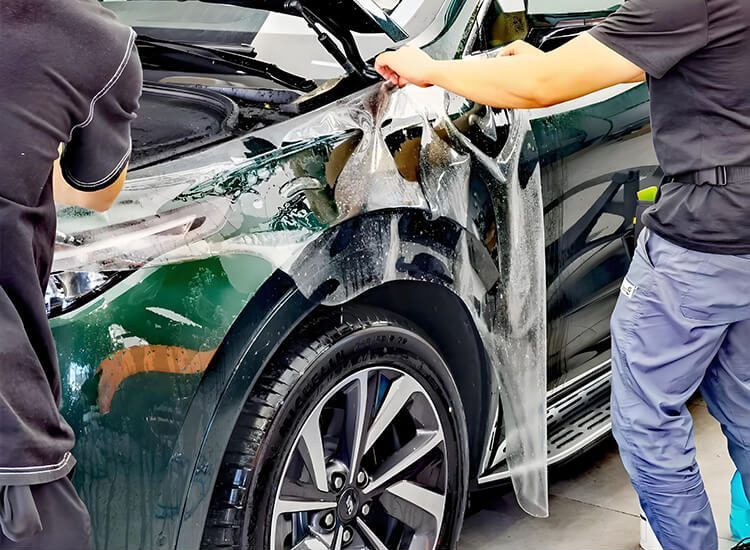
Car paint protection film installation is the process of applying a transparent, durable polyurethane film over your vehicle’s painted surfaces. Often called a clear bra installation process, this film acts as a shield against stone chips, scratches, bug splatter, and UV damage. The goal of paint protection film application is to keep your vehicle’s paint in pristine condition while maintaining its original shine. Learn more about automotive paint protection film thickness to choose the right film.
Why Choose PPF Over Other Options
Paint protection options like waxing or ceramic coating can help, but none provide the same level of impact resistance as a vehicle paint protection film setup. A PPF is self-healing, which means light scratches and swirl marks can disappear with heat. For car enthusiasts, this feature makes PPF worth the investment compared to traditional methods. You can check 10 automotive paint protection film myths to avoid common misunderstandings.
Tools Needed for a Successful Installation
To begin a step by step PPF installation guide, you’ll need the right tools. A heat gun, squeegee, spray bottle with slip solution, microfiber towels, and sharp blades are essential. The best tools for automotive paint protection film installation ensure the film adheres smoothly without bubbles or wrinkles. Skipping quality tools often leads to poor results.
| Tool | Purpose | Estimated Price Range |
|---|---|---|
| Heat Gun | Softens the film for stretching and conforming to curves | $25 – $60 |
| Squeegee | Smooths out bubbles and ensures proper adhesion | $5 – $15 |
| Spray Bottle with Slip Solution | Allows repositioning of the film during installation | $10 – $20 |
| Microfiber Towels | Cleans and dries the surface without scratching | $10 – $25 (pack) |
| Sharp Blades (Precision Knife) | Cuts excess film cleanly for perfect edges | $8 – $20 |
| Gloves (optional) | Prevents fingerprints and improves grip | $5 – $12 |
| Infrared Thermometer (optional) | Monitors surface temperature for precise heating | $15 – $35 |
DIY vs Professional PPF Installation
Some car owners prefer DIY automotive paint protection film installation, especially if they want to save money. DIY kits can be effective for small panels, but they require patience and precision. On the other hand, professional automotive paint protection film installation provides flawless results, often backed by warranties. While the PPF coating cost may seem high, it’s often worth it for luxury or new vehicles.

Step by Step Automotive Paint Protection Film Installation
Step 1: Clean the Surface Thoroughly
Before beginning auto paint shield installation, wash and clay bar your car to remove dirt, wax, or debris. Any contamination will prevent proper adhesion.
Step 2: Prepare the Film
Unroll the PPF and cut it to fit the panel. Many kits include pre-cut patterns, which make PPF installation instructions easier to follow. You can see the top options in Top 12 PPF Brands For Cars.
Step 3: Apply Slip Solution
Mist the surface with slip solution (a mix of water and baby shampoo) so the film can slide into place. This step is crucial in any clear bra film installation guide.
Step 4: Position the Film
Carefully place the film onto the panel. Adjust as needed until it aligns with the edges.
Step 5: Squeegee Out Air and Water
Use a squeegee to remove bubbles and water from under the film. Smooth strokes are key for a professional finish.
Step 6: Apply Heat for Edges and Curves
A heat gun helps stretch the film and activate its adhesive on tricky corners. It also allows the self-healing feature to activate over time.
Step 7: Inspect and Finish
Check for edges lifting or bubbles forming. If necessary, reapply pressure or heat. This final step ensures a clean car paint wrap protection install.
Common Mistakes to Avoid
Even with a PPF installation step by step video or guide, beginners often make errors. The most common include:
- Not cleaning the surface thoroughly before applying film
- Using too little slip solution, making the film stick too quickly
- Stretching the film excessively, which can damage it
- Rushing through the process instead of working panel by panel
These common mistakes in paint protection film installation can ruin the finish and reduce durability.
Tips for Beginners
If you’re starting with automotive paint protection film installation tips for beginners, begin with smaller panels like mirrors or door edges. Avoid complex curves until you’re more confident. Always work indoors, away from dust and direct sunlight.
How Long Does Installation Take?
Many car owners wonder, how long does automotive paint protection film installation take? A DIY job on a single panel might take one to two hours, while a professional full-car application can take two to three days. For detailed longevity info, see How Long Paint Protection Film Last? and Long Automotive Paint Protection Film Last. Patience is essential for quality results.
Training and Skill Development
Those interested in mastering this craft can take an automotive paint protection film installation training course. Such programs teach advanced techniques, cutting methods, and handling complex curves.
Cost Considerations
The automotive paint protection film installation cost depends on your car’s size, film brand, and whether you choose DIY or professional services. For budget-conscious car owners, a PPF installation DIY kit can be a cost-effective option. For calculating required materials, check PPF Usage Volume.
Product Recommendations – 6.0–6.5 Mil, 5*50ft Rolls
For those looking for quality PPF options, here’s a comparison of 5 popular films suitable for everyday and professional use:
| Brand | Price per Roll (USD) | Use Case / Location | Simple Performance Analysis |
|---|---|---|---|
| PreproPPF Ultra | $389 | Full car, bumpers, hood | Self-healing, high clarity, scratch-resistant |
| XPEL Armor | — | Front bumper, hood | Durable, UV resistant, easy to clean |
| 3M Scotchgard | — | Doors, mirrors, high-risk areas | Excellent adhesion, moderate self-healing |
| SunTek Ultra | — | Entire vehicle, fleet cars | Smooth finish, high gloss, anti-yellowing |
Is It Worth It?
The final question many ask is whether car PPF installation guide steps are worth the time and money. The answer depends on your vehicle’s value, your tolerance for minor imperfections, and your desire for long-term paint protection. For high-value cars, the investment pays off in preserved resale value and stunning looks.

PreproPPF Clear PR-Q01
PreproPPF Factory Direct – Free Shipping to Canada
Looking for high-quality PPF at unbeatable prices? At PreproPPF, we offer factory-direct paint protection film with free shipping to Canada. Every order includes premium film, trusted by professionals, and delivered right to your door. With global delivery and no middlemen, you save money while ensuring your vehicle stays protected. Order today and enjoy the convenience of factory-to-door service.
Frequently Asked Questions
What is the average cost of automotive paint protection film installation?
The cost can range from a few hundred dollars for partial coverage to several thousand for a full wrap, depending on the film quality and installer.
Can I do automotive paint protection film installation at home?
Yes, with a step by step PPF installation guide, DIY is possible. However, beginners should start with smaller panels before attempting a full car.
How long does professional automotive paint protection film installation last?
Most professional applications last 5–10 years, depending on film brand, maintenance, and exposure to environmental factors.